Introduction.
Find out how to repair mobile home exterior sheathing by following the easy steps explained below.
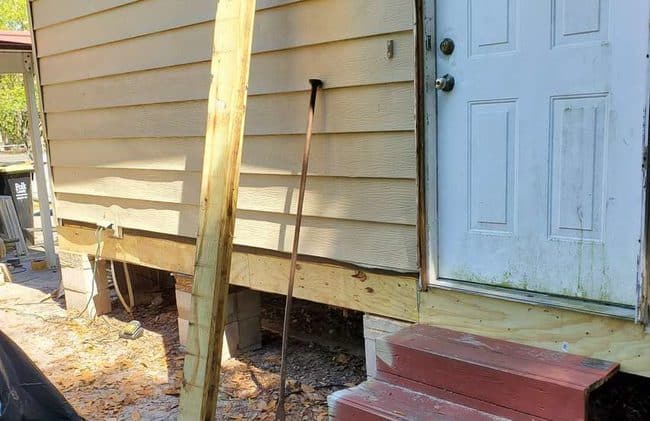
I was just preparing to build a new deck on a mobile home when I realised that there was structural damage to the mobile home wall.
Water had managed to squeeze between the old deck and the mobile home wall. The sheathing was damaged and the surface was no loner water proof.
I decided to record the whole process.
How Did I Notice The Damage?
Rebuilding a deck on my home which was old and damaged.
The deck was originally built from pressure treated lumber but had been painted several times. Parts of the deck were unsafe and the rails were made from aluminum which was bent and twisted from use.
Removal Of The Old Deck.
I started to remove the old deck piece by piece to see if any the wood could be salvaged.
I removed the decking, I could see that the old deck ledger board was screwed to the sill plate through the bottom row of aluminum siding.
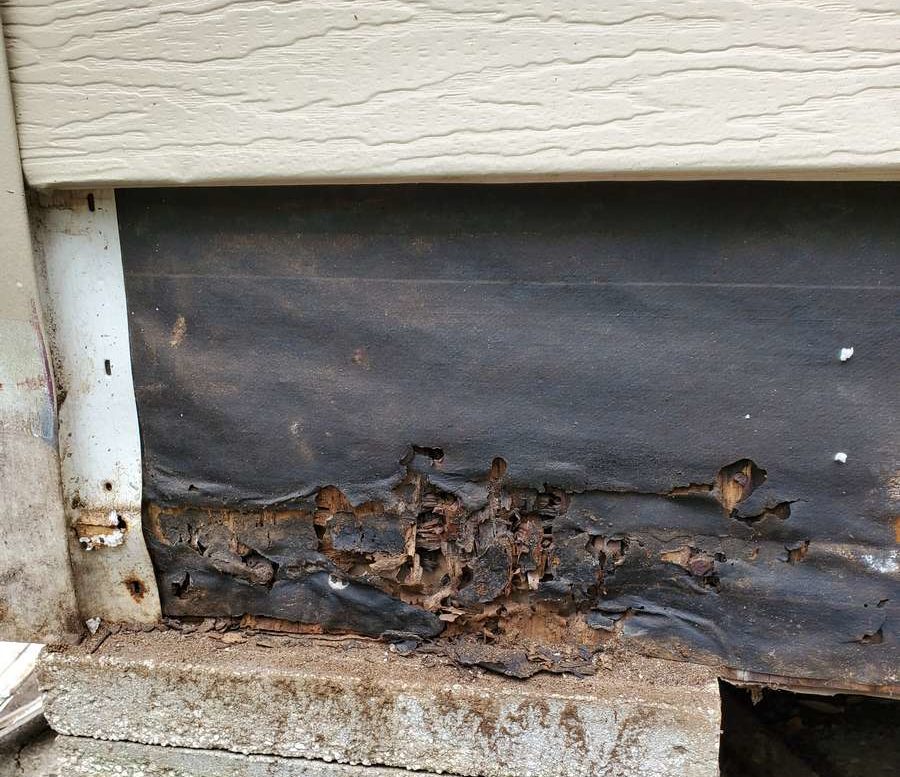
Obvious Damage.
The siding was full of holes and had been leaking water for years. Using my hand to feel up and behind the siding revealed water damage to the sheathing layer.
This would need to be repaired asap to prevent damage to the floor and floor joists.
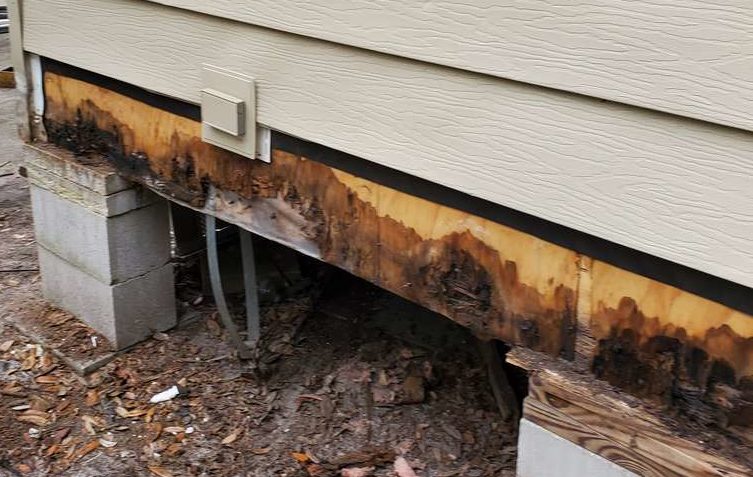
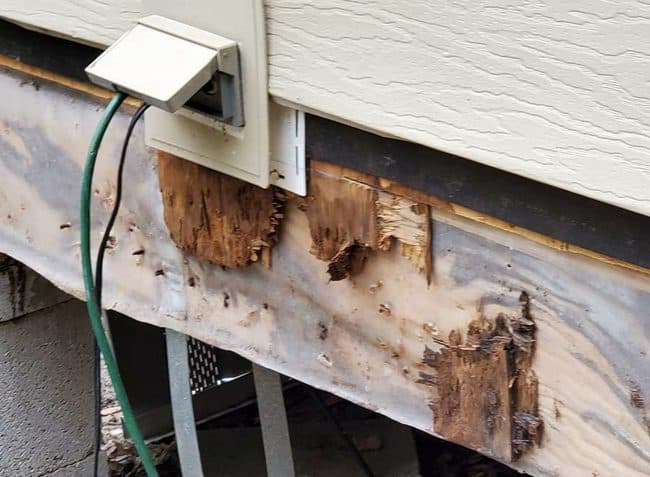
Assessing The Extent Of The Damage.
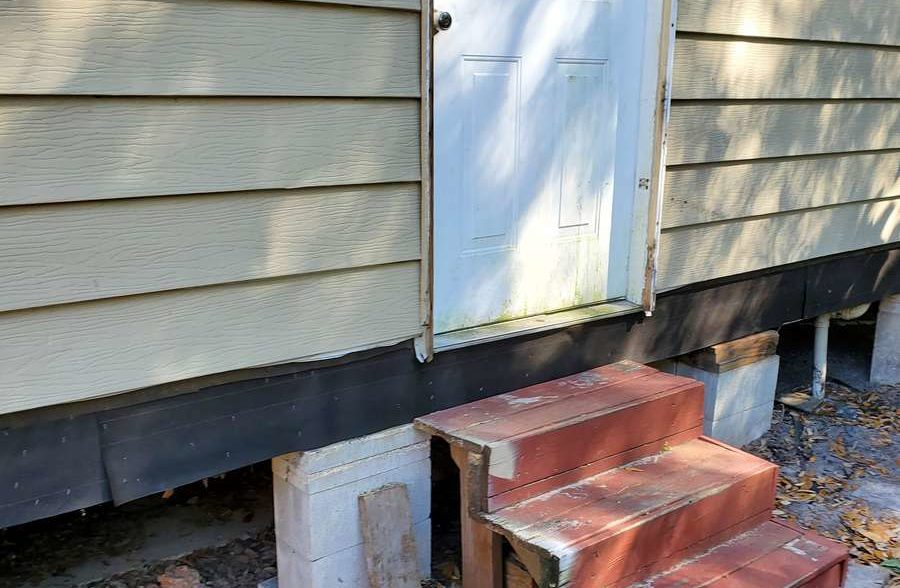
In order to get a better look at the rotten structure, I removed the old ledger board and the first row of lap siding.
Behind the siding there was a layer of 15lb roofing felt, on top of OSB, on top of a a polythene sheeting.
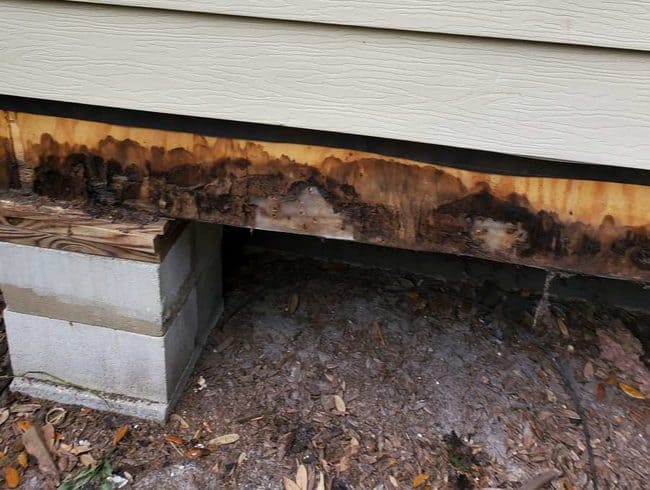
The damage to the wall was confined to the bottom 6 inches of OSB and Felt.
What Is The Outside of a Mobile Home Made Of ?
2″x4″ or 2″x3″ framing with insulation between the uprights.
This can be covered with a number of materials including plywood, oriented strand board OSB, felt paper, polytheme film, cardboard panels.
Usually this is then covered with metal siding, vinyl siding, hardie board or fiber board (not used any more).
Older Mobile Homes From 1950 -1980s.
Some older houses are just 2″x3″ covered with metal siding.
Newer Homes Built To Recent Updated Codes.
- Framing.
- Electrical wiring.
- Insulation.
- Decking material.
- Water retardent covering.
Tools Needed for the Sheathing Repair.
- Small pry bar.
- Hammer.
- Sharpe Knife.
- Impact Driver and bits.
- Circular/skill saw and a medium blade.
- Extension power cord.
- Chalk line and box.
- Caulk gun.
Materials Needed for the job.
- One tube of silcone caulk.
- Box of 2 1/4 inch exterior deck screws.
- 15lb or 30lb roofing felt.
- 6 mm poly sheet
- 1 1/2 inch galvanized roofing nails.
- Sheet of 1/2 inch thick pressure treated plywood.
Safety Considerations.
Please take care when using power tools especially those powered from the mains at 115v.
Cutting plywood with a skill saw can be hazardous. There are often nails or staples embeded in the material.
Where safety glasses and gloves to protect your eyes and hands from splinters and rusty nails.
Keep you work area free of obstructions and demolition debris.
Repair Proceedure.
- Cut back the damaged roofing felt until good felt is reached at around 12 inches high. The good felt should not crumble to the touch.
2.Mark of the damaged OSB with a string line/chalk box and carefully cut back the bottom of the damage.
When cutting, Set the saw blade so that it does not cut into the poly film or the stud work. This was about 6 inches but I extended the cut to 8 inches level with the bottom of the two doors.
3. Pull out any old screws or nails. If they cannot be removed fully then they should be hammered into the existing woodwork until flush.

4. Repair any tears in the polythene. Install new plastic beneath the existing if needed to keep it water resistant.
5. Cut 8 inch strips of new pressure treated 1/2 inch plywood to replace to old OSB.
6. Seal the joints between the old OSB and the new plywood with silicone caulk.
7. Screw in the new decking with external deck screws at max 16 inches on center into the sill plate.
8. Cut strips of roofing felt to slide under the existing felt. (Taking care to overlap the top edges as much as possible and at least 6 inches across the wall).
The wall is now prepared for the addition of siding to finish off the job.
To see how to install vinyl siding click here.
Conclusions.
One of the biggest take aways from this page is that as a home owner always repair issues that you find whilst doing another DIY project.
In this particular case, I needed to fix the damage caused by the old deck before installing a replacement deck in its place.
Not only would the wall have eventually leaked and caused more damage but also the repair was much easier to get to after the demolition of the old deck.